Thursday, November 28, 2013
Rocket Project.
This is the rocket man project we made that has 3 scenes. The rocket is animated with motion tweens. And most of everything that moves is a motion tween. But the Alien ship that turns into a cloud is a shape tween.
South Park
This is the south park animation of Olivia and I. We first started out by making our own south park characters on the south park me website. Then we went into flash and imported the characters into the stage. To make them walk, we converted the characters to a symbol and moved the characters side to side on a series of key frames to make them look like they were walking. Next I applied motion tweens to everything that moves in the animation on several different layers.
Coldplay Quiz
This is the Coldplay quiz a made on flash. To make this, we made all of the clickable objects button symbols. This took us a lot of time because we had to apply lots of actions in the action layers.
Flower to Flower
This is my animation of the word flower to a picture of a flower. To make this, we applied a shape tween by typing the word on the first frame, going to the last frame and deleting the word, and then added the picture of the flower. Flash does most of the work of animating the word to the picture.
Flying Bug
This is the flying bug animation I made in Flash. To make this, we first made wings and went into there own layer to make them look like they are flying. To make the wings look like they were flying, we moved the wings each time on a series of keyframes. To make the bug move, we applied a motion tween and rotated the bug a bit so it was flying in the right direction.
Flying Eye
This is my animation of a Halloween flying eye. We applied a motion tween to the eye to make it look like it moved closer, and also we adjusted the scaling of the eye to make it look like it was coming closer.
Tuesday, November 26, 2013
Stop Light
This is the stop light i animated on flash CS4. To make this, we used motion tweens that involved a lot of timing so that the lights would come on at the right time.
Truck
This is my animation of a truck going up and down hills. To make the tires spin, the tire must be a symbol and in its own symbol section you can apply a rotating effect to make the tires rotate once every 24fps. To make the ground move with the tires, we applied a motion tween that repeats. To make the truck go up and down the hills, I put a keyframe on every frame and moved the truck so it wold line up with the ground as it moved.
Tuesday, November 12, 2013
Hand Writing

This is my quote done with a hand writing affect. To make this, we added the text and added a key frame every time we erased a little bit of a letter, backwards.
Realistic Ball Bounce
This is my realistic ball bounce. To make the ball bounce realistically, we added a key frame to every frame and re-positioned the ball. When we re-positioned the ball, we made it look like it had the squash and stretch effect on it.
Monday, November 11, 2013
Sunday, November 10, 2013
Blog Question #3
Straight ahead animation is when someone draws each scene right after another without any gaps in between. Pose to Pose is when someone draws the main scenes first and then adds the other scenes in between. Pivot animator uses straight ahead animation because you have to draw each frame right after each one with no gaps in between. Flash uses pose to pose because you start at the beginning and add a key frame at the end and add a tween in the middle to fill in everything in between. I like to use pose to pose because its easier to do, and it's a lot quicker.
Friday, November 8, 2013
Ball Bounce: 3 Balls...
Using Flash CS4, i animated 3 balls bouncing off of the walls. To make the balls animate, I had to use motion tweens for each of the balls.

Monday, November 4, 2013
Blog question #2
Ethics are rules that we make that tell us what we think is good and bad. Aesthetics are things that show beauty, taste and are pleasing in appearance.It is ethically not acceptable to photo-shop a photo when you are going to the police or court with photo evidence.It is ethically acceptable to use photo-shop when you put pictures in books or magazines, as long as the photo looks realistic.
Pop Art

Rainbow eye

Wednesday, October 30, 2013
Running Man

Tuesday, October 29, 2013
Girl Roll Over
http://www.tvdsb.ca/webpages/sklein/files/girl%20rollover.swf
This is the link to my girl roll over effect that i used in flash CS4. You import a picture to the stage and add text if you want, next you convert your image to a symbol-> type: Button. Then, double click the picture, Selection Tool à Right Click OVER à Insert Keyframe. Finally, find a new picture and insert it into the stage, move and resize the picture.
Wednesday, October 9, 2013
Veggie Face

To make this veggie face, I used the quick selection tool, the magnestic lasso and the magic wand tool to select the veggies to put on the face. I also used copy and paste to copy and then paste the veggies onto the face. For the eyebrows and the ears, i flipped and rotated the images with the options under the image tab.
Monday, October 7, 2013
Polar Bear Tiger

I got a picture of a tiger and a picture of a polar bear, cut out the polar bear head and put it on top of the tiger head with the help of the clone stamp tool and burn tool to make it blend.
Friday, October 4, 2013
Motion Blur Effect

Thursday, October 3, 2013


Monday, September 30, 2013

Thursday, September 26, 2013
Magazine Cover
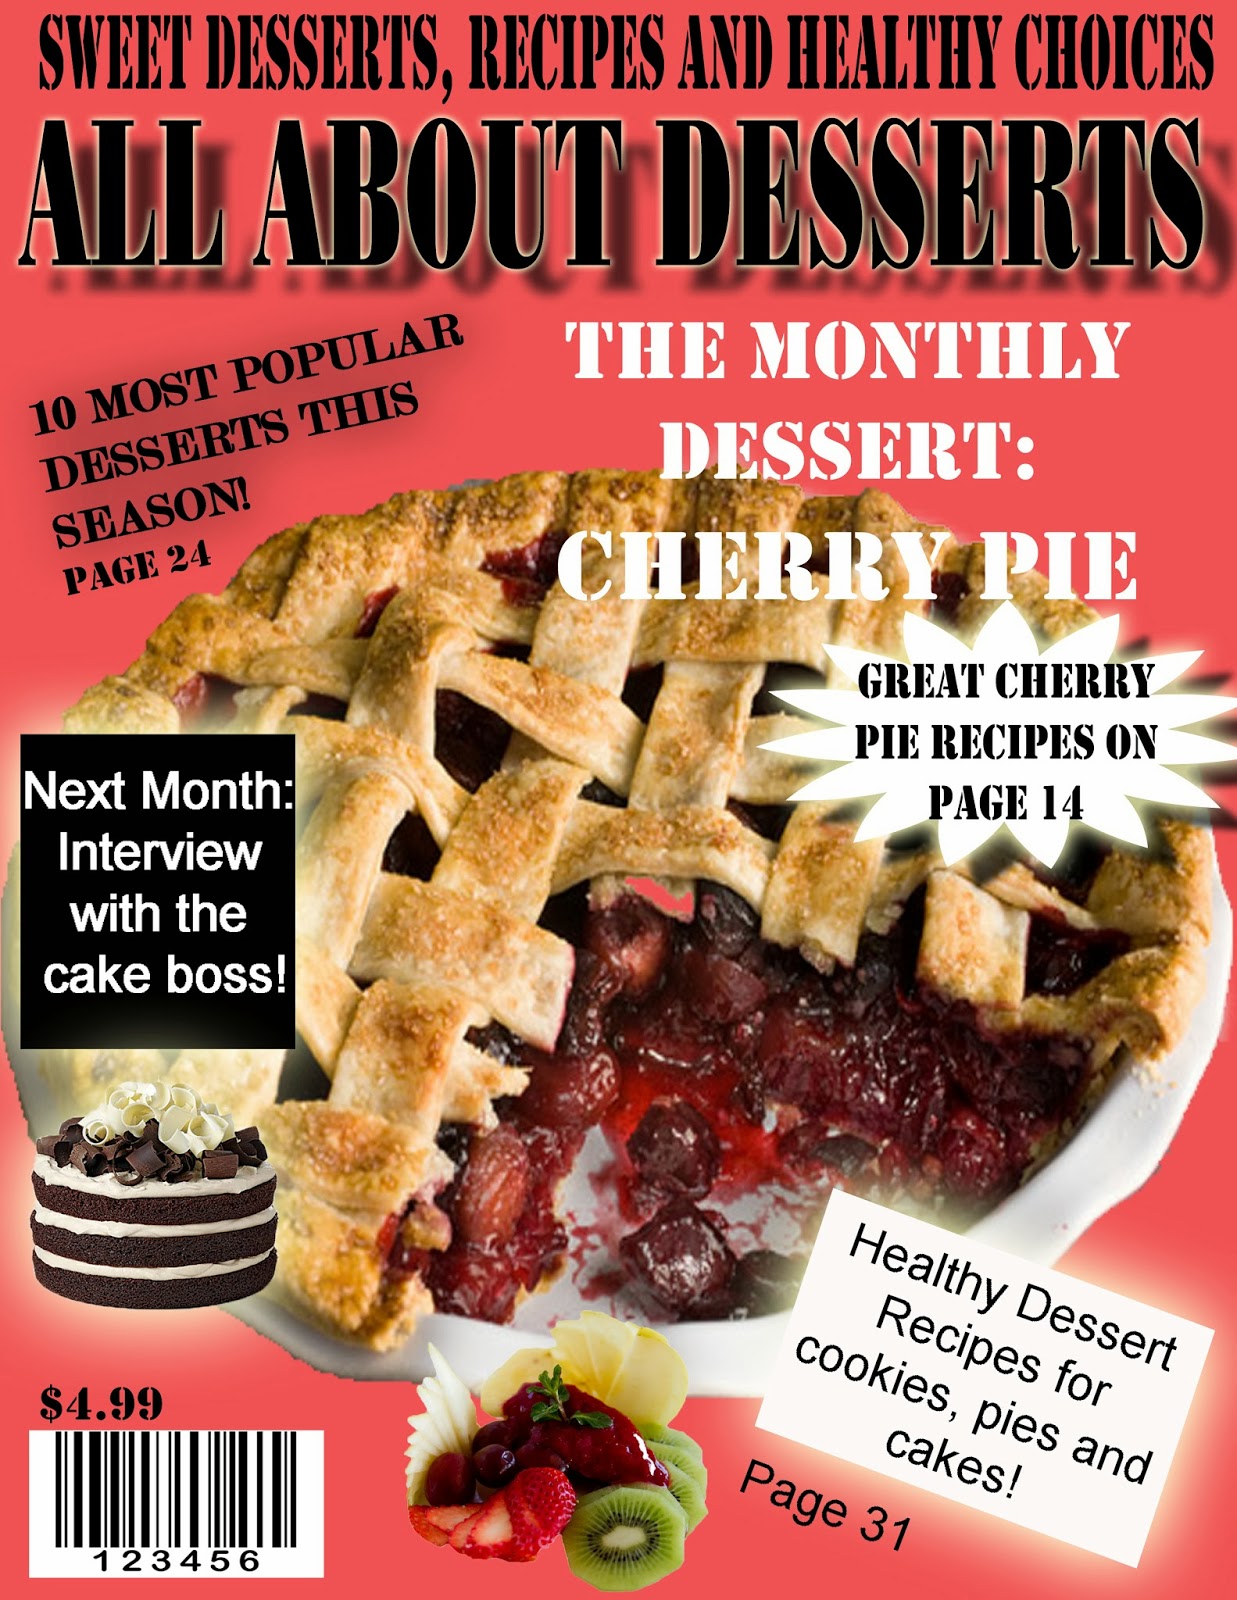
This is the magazine cover i created on photoshop. On this image i put a mast head, a banner, flashes to catch to readers attention, a central image, puffs, featured articles, the lead article and many images and colours to catch the readers attention.
Wednesday, September 25, 2013

Monday, September 23, 2013

Thursday, September 19, 2013

The use od photographic evidence isnt very useful anymore because it is so easy to just put an image into photoshop and edit it.
If someone had a picture of me robbing a bank but i know i didnt do it, i would tell the police that photo evidence isnt useful because of what photoshop can do to a picture.


Friday, September 6, 2013


Subscribe to:
Comments (Atom)